
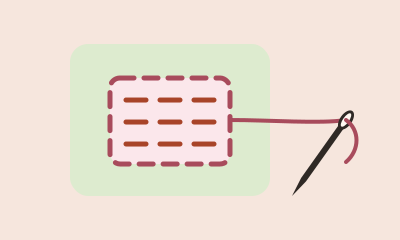
How to Mend Jeans for Beginners
For a first mend on jeans, put a sashiko-style patch behind the hole or rip, then hold it on with rows of running stitch worked from the outside. The same fix covers a clean tear, a hole with fabric missing, and a worn knee, as long as the cloth around the damage passes a pinch test.
Sashiko is a Japanese stitching tradition that uses rows of small running stitches to reinforce and mend cloth. What we teach here is sashiko-style: the same running stitch, used the way many beginner mending tutorials use it. It isn't traditional sashiko, which has its own patterns and teachers.
The stitch-by-stitch version, with diagrams, is Part 5 of the visible mending guide. If you are still choosing between a patch and a darn, start with Patch or Darn? How to Choose.
What you need
- A sharp needle with a long shaft and a large eye, such as a sashiko or embroidery needle
- Sashiko thread or perle cotton #8. Embroidery floss [UK: stranded cotton] also works: some tutorials say to use 4 strands, or to double it
- A scrap of woven cotton or denim of a similar weight. Stretchy fabric isn't recommended for a first patch
- Small sharp scissors, pins, and a piece of cardboard that will slide inside the leg
- An iron, if you plan to fold the patch edges under
For the practice patch, choose a thread color that contrasts with the jeans. It's easier to see what your stitches are doing. Matching thread hides the repair. Contrasting thread is the visible-mending look, and it helps while you are learning, because you can see each stitch. Straight, even rows of running stitch are enough for a first design; grids and motifs can wait.
Safety: Keep needles, pins and scissors out of reach of young children and pets, and mind the iron when you press the patch edges.
Check the damage first
Press the fabric next to the hole or rip between your fingers. If it tears under light pressure, the area is too thin to hold stitches, and a mend won't last.
A clean tear, where the edges still meet and the cloth around them is sound, is different from a hole with fabric missing. On jeans, both get the same first fix: a sashiko-style patch behind the damage, with rows of running stitch that cross the tear and run past both ends onto sound cloth. If the cloth near the damage feels thin but passes the pinch test, cut the patch big enough to reach past the thin area onto solid fabric. Seat and inner-thigh wear put more strain on hand stitching; save those for later.
The first patch, in brief
- Trim loose threads around the hole or tear. Cut a patch about 1 in (2.5 cm) larger than the damage on every side (tutorials range from ½ in to at least 1 in; go bigger if the cloth around the hole is thin). For a neater look, fold the raw edges under about ½ in (about 1.3 cm) and press them. Folding uses up some of the overlap, so if you fold, cut the patch 1½ in (4 cm) larger on every side.
- Turn the jeans inside out. Put the patch behind the hole and pin it, with no wrinkles, then baste it with long, loose temporary stitches through the patch and that one layer of the jeans only. On a knee, pin with the leg in its bent, worn position. If you pin it flat, the patch can pucker when the leg bends.
- Cut about 18–24 in (45–60 cm) of thread (a longer piece tangles) and knot one end. Take out the pins; the basting now holds the patch. Turn the jeans right side out and slide a piece of cardboard inside the leg, under the patch, so the needle can't catch the back of the leg. Start from the inside so the knot stays hidden, then work the rows on the outside.
- Stitch parallel rows of running stitch, about ¼ in (6 mm) apart, through both the jeans and the patch. Aim for stitches about the size of a grain of rice, roughly 4 to 8 to the inch, with the stitches on the back a little shorter than those on the front. Let each row start and end slightly beyond the patch, on the jeans. Sources suggest a first patch should be plain: straight, even rows. A grid can wait. If you draw the lines, test an erasable pen on a scrap first.
- At the end of a row, don't pull the thread tight before you turn. Leave a small loop on the inside so the fabric has room to move. At the end, run the needle under a few stitches on the back, knot, and trim. Remove the basting and the cardboard.
A long rip or a worn knee
A long rip still uses this patch. Cut the patch so it covers the whole rip and reaches onto sound cloth past both ends and both sides. When you pin, lay the torn edges so they meet flat, without overlapping or gaping. The running-stitch rows should cross the tear and run past both ends, not stop at the tips.
A worn denim knee is a common first hard spot. Pin and baste with the leg bent, use a patch that reaches onto strong cloth past the thin area, and expect more strain than on a flat tear above the bend. Optional idea: if you already sew by machine, one tutorial suggests stitching the patch on underneath first and adding the visible hand stitches on top.
What to save for later
This page is for regular jeans, one layer of woven denim. Insulated or lined work pants have a second layer inside, which makes it harder to keep the needle in one layer on a first mend. A chewed or frayed edge, such as a jacket hem or cuff, is a different shape: the first patch needs sound cloth all around the damage to stitch into, and this page doesn't teach an edge fix.
If the patch puckers or the cloth is thin
Puckering is usually the thread pulled too tight, or the fabric stretched when you pinned it. Ease the tension, re-stitch more loosely, and leave a small loop at each turn. If you pinned a knee while the leg was flat, take out the stitches in the puckered part, then re-pin and baste it with the leg bent before you stitch it again. If the fabric around the hole still feels thin, make the patch bigger so it covers the thin edge. If it tears when you pinch it, it's too far gone for a hand mend. More of this is in Part 6 of the guide.
Where to go next
- Visible Mending for Beginners: tools, the patch steps with diagrams, and common problems.
- Patch or Darn? How to Choose: when to patch woven cloth and when to darn a knit.
- The mending primer and directory, including a first patch and a grid pattern.