
Patch or Darn? How to Choose
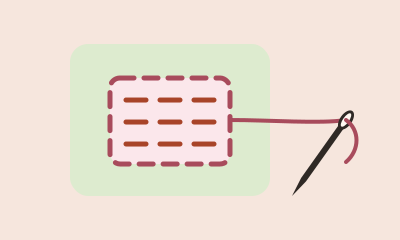
A darn rebuilds the missing fabric with thread alone. You lay threads one way across the hole (the warp), then weave the other way (the weft). A patch adds a piece of cloth behind or on top of the damage, then stitches it down.
There aren't hard rules. For a first mend, it is common to darn knits, such as socks and sweaters [UK: jumpers], and to patch woven cloth, such as jeans and shirts, especially when the area around the hole feels thin. The full steps are in Visible Mending for Beginners.
Check the cloth first
Press the fabric next to the hole between your fingers. If it tears under light pressure, the area is too thin to hold stitches, and a mend won't last.
Knitted fabric is made of loops and stretches. Socks and sweaters are knits, and sweatpants usually are too, including French terry and fleece. If the fabric is made of loops and stretches, treat it as a knit. Woven fabric is made of threads crossing over and under, and it barely stretches. Jeans, shirts and linen are woven.
A clean tear, where the edges still meet and the cloth around them is sound, is different from a hole with fabric missing. On woven cloth, both get the same first fix on this site: a sashiko-style patch behind the damage, with rows of running stitch that cross the tear and run past both ends onto sound cloth. For a hole in a knit, use a woven darn. If the cloth near the damage feels thin but passes the pinch test, make the darn or patch big enough to reach past the thin area onto solid fabric.
| What you're looking at | First fix |
|---|---|
| Hole in a sock, sweater or other knit | Woven darn (Part 4) |
| Thin spot in a knit, not yet a hole | Swiss darning (duplicate stitch), a step up from the woven darn, in the mending directory |
| Hole, worn knee or clean tear in jeans or other woven cloth | Sashiko-style patch behind the damage (Part 5) |
| Small hole or stain on a woven shirt | Embroidery over the spot, in the directory, or a small sashiko-style patch (Part 5) |
The same chooser is in Part 2 of the guide. For a first mend, choose a lower-stress spot when you can, such as a sweater elbow, a sock heel, or a tear in jeans above the knee bend. A worn denim knee is a harder first patch; seat and inner-thigh wear can wait.
Common first questions
Should I darn a small hole in sweatpants, or patch it?
If your sweatpants are a knit, as they usually are, use a woven darn for a hole. A patch is the first method this site teaches on woven cloth, such as jeans. Closing a hole by sewing the edges together doesn't replace the missing fabric.
A ladder (a run of dropped stitches) is a different problem from a hole with fabric missing. This page covers holes and worn spots, not how to catch a run.
What about a big hole and a small one in linen, or other woven cloth?
Linen is woven, like a shirt or a pair of jeans. On woven cloth, the first fix in our guide is a sashiko-style patch for both a small hole and a larger one. Cut the patch about 1 in (2.5 cm) larger than the hole on every side, and go bigger if the cloth around it is thin, so the patch reaches onto solid fabric. A woven darn, in our guide, is the method for knits. If the cloth fails the pinch test, a hand mend won't last.
Will a patch make the garment less comfortable?
A patch adds a layer of cloth, so the spot will feel a little thicker than the fabric around it. Our guide uses woven cotton or denim of a similar weight for a first patch, and puts the patch behind the hole, on the inside. Stretchy fabric isn't recommended, because it can warp under stitches. Keeping the patch smooth, and basting through the patch and that one layer of the garment only, helps it lie flat.
Knits feel tricky. Where do I start?
Start with a small hole in a sock, a sweater elbow or a cardigan, on solid knit that passes the pinch test. You don't need a starting knot on a knit. Leave a tail of about 4 in (10 cm) hanging on the back; the first catch into a solid knit stitch secures the start. Don't tie a finishing knot either. A knot inside a sock can be uncomfortable. Weave each tail under the stitches around the edge of the darn on the back for about 1 to 2 in (2.5 to 5 cm), going the longer way with smooth cotton thread, then trim. The back should look flat. The full walkthrough is in Part 4, including how to start and finish the thread.
Match or contrast thread?
For practice darns and patches, choose a thread color that contrasts with the garment. It's easier to see what your stitches are doing. Matching thread hides the repair. Contrasting thread is the visible-mending look, and it helps while you are learning, because you can see each stitch. Straight, even rows of running stitch are enough for a first design; grids and motifs can wait. For a button, match the thread instead (Part 3).
What you'll need
You may already own most of what you need. For a darn on a knit, use a darning needle or a blunt yarn needle, yarn or thread that matches the fiber (the same thickness or a little thinner), and something smooth and round to stretch the hole over, such as a darning mushroom, an orange or a tennis ball. For a patch on woven cloth, use a sharp needle with a long shaft and a large eye, sashiko thread or perle cotton #8, and a scrap of woven cotton or denim of a similar weight. The full list is in Part 1 of the guide.
Safety: Keep needles, pins and scissors out of reach of young children and pets, and mind the iron when you press or steam.
Where to go next
- Visible Mending for Beginners: the full walkthrough and the Part 2 chooser.
- How to Mend Jeans for Beginners: the jeans patch, including a long rip and a worn knee.
- The mending primer and directory: a word list and more free tutorials.